Scripts, Tips & Tricks
602

Simple Login Form in PHP and MySQL

Simple Login Form in PHP and MySQL

In this tutorial, you will get free source code to create a simple login form in PHP and MySQL. It is developed with complete validation. It will be very useful to develop the best login system. So, you can easily integrate it into your projects.

The login form is an integral part of a web application. It is used to access individual information from the websites. Many popular websites  Such as Facebook, Gmail, LinkedIn, Twitter & more have login features. Even you can use it to create an admin login panel for managing the front-end content dynamically.

Simple login Form in PHP

How to create a Simple Login Form Using PHP

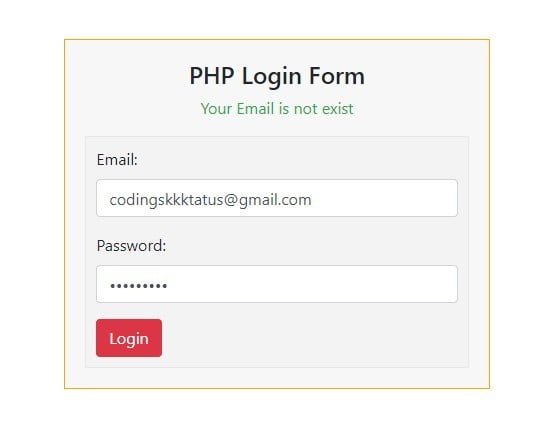
The login form is created with two required fields like email & password. These fields have a backend validation to accept only valid& registered email address & password

Features –

  • Using PHP, It can send login data through the POST method.
  • Using MySQL, It can check registered users.
  • Login form does not allow invalid data and protects from the hacking
  • Login can convert illegal user input into legal input data.
  • You can’t get into the dashboard until you will not log in with valid credentials.
  • You can log out after login.

Before creating a login form in your project, you must have to create a signup/registration form. Because users can’t log in without signup/ register. If you don’t know to create a registration form, then there is no need to worry, you can also learn it on this website by clicking the following link.

Folder Structure

You should create the following folder structure. Otherwise, you can use the given login script directly in your project.

login-system/
    |__database.php
    |__login-form.php
    |__login-script.php
    |__dashboard.php
    |__logout.php
    |__style.css


1. Connect PHP login Script to MySQL Database

First of all, write the following MySQL database connection script to connect PHP login System with Database.

File Name – database.php

<?php
$hostname = “localhost”; // enter your hostname
$username = “root”; // enter your table username
$password = “”; // enter your password
$databasename = codingstatus.com; // enter your database
// Create connection
$conn = new mysqli($hostname, $username, $password,$databasename);
// Check connection
if ($conn->connect_error) {
die(“Unable to Connect database: “ . $conn->connect_error);
}
?>

2. Create Login Form Using HTML

Now, configure the following steps to create a login form using HTML

  •  Include login-script.php using the following script. Don’t worry it will explain it in the next step.
  • Include external style.css
  • Also, include the following bootstrap4 libraries to create a responsive login form.
  • Write the HTML code to create a login form

File Name – login-form.php

<?php
include(‘login-script.php’);
?>
<!DOCTYPE html>
<html lang=“en”>
<head>
<title>PHP Login Form</title>
<meta charset=“utf-8”>
<meta name=“viewport” content=“width=device-width, initial-scale=1”>
<!–bootstrap4 library linked–>
<link rel=“stylesheet” href=“style.css”>
</head>
<body>
<div class=“container-fluid”>
<div class=“row”>
<div class=“col-sm-4”>
</div>
<div class=“col-sm-4”>
<!–====registration form====–>
<div class=“registration-form”>
<h4 class=“text-center”>PHP Login Form</h4>
<p class=“text-success text-center”><?php echo $login; ?></p>
<form action=“<?php echo htmlspecialchars($_SERVER[“PHP_SELF“]);?>” method=“post”>
<!--// Email//–>
<div class=“form-group”>
<label for=“email”>Email:</label>
<input type=“text” class=“form-control” id=“email” placeholder=“Enter email” name=“email”>
<p class=“err-msg”>
<?php if($emailErr!=1){ echo $emailErr; } ?>
</p>
</div>
<!--//Password//–>
<div class=“form-group”>
<label for=“pwd”>Password:</label>
<input type=“password” class=“form-control” placeholder=“Enter password” name=“password”>
<p class=“err-msg”>
<?php if($passErr!=1){ echo $passErr; } ?>
</p>
</div>
<button type=“submit” class=“btn btn-danger” value=“login” name=“register”>Login</button>
</form>
</div>
</div>
<div class=“col-sm-4”>
</div>
</div>
</div>
</body>
</html>

3. Design Login Form Using CSS

Use the following custom CSS code to design the login form

File Name – style.css

.registration-form{
background: #f7f7f7;
padding: 20px;
border: 1px solid orange;
margin: 50px 0px;
}
.err-msg{
color:red;
}
.registration-form form{
border: 1px solid #e8e8e8;
padding: 10px;
background: #f3f3f3;
}


4. Create a Login Script Using PHP and MySQL

Before writing a login script, you should understand the following points.

  • Include database connection file using require_once('database.php').
  • Assign a connection variable $conn to a new variable $db.
  • Check registration data are set using isset($_POST['submit']), if these are set then validate email & password using legal_input() function.
  • If both email & password  are validated successfully, call a custom function login() to process to login by checking valid credentials
  • If given credentials are already registered, it will redirect to the dashboard page.

File Name – login-script.php

<?php
require(‘database.php’);
$db= $conn; // assign your connection varibale
// by default, error messages are empty
$login=$emailErr=$passErr=;
extract($_POST);
if(isset($_POST[‘submit’]))
{
//input fields are Validated with regular expression
$validName=“/^[a-zA-Z ]*$/”;
$validEmail=”/^\w+([\.-]?\w+)*@\w+([\.-]?\w+)*(\.\w{2,3})+$/”;
//Email Address Validation
if(empty($email)){
$emailErr=“Email is Required”;
}
else if (!preg_match($validEmail,$email)) {
$emailErr=“Invalid Email Address”;
}
else{
$emailErr=true;
}
// password validation
if(empty($password)){
$passErr=“Password is Required”;
}
else{
$passErr=true;
}
// check all fields are valid or not
if( $emailErr==1 && $passErr==1)
{
//legal input values
$email= legal_input($email);
$password= legal_input(md5($password));
// call login function
$login=login($email,$password);
}
}
// convert illegal input value to ligal value formate
function legal_input($value) {
$value = trim($value);
$value = stripslashes($value);
$value = htmlspecialchars($value);
return $value;
}
// function to insert user data into database table
function login($email,$password){
global $db;
// checking valid email
$sql=“SELECT email FROM users WHERE email= ?”;
$query = $db->prepare($sql);
$query->bind_param(‘s’,$email);
$query->execute();
$exec=$query->get_result();
if($exec)
{
if($exec->num_rows>0){
// checking email and password
$loginSql=“SELECT email, password FROM users WHERE email=? AND password=?”;
$loginQuery = $db->prepare($loginSql);
$loginQuery->bind_param(‘ss’,$email, $password);
$loginQuery->execute();
$execQuery=$loginQuery->get_result();
if($execQuery)
{
if($execQuery->num_rows>0){
session_start();
$_SESSION[’email’]=$email;
header(“location:dashboard.php”);
}else{
return “Your Password is wrong”;
}
}else{
return $db->error;
}
}
else
{
return $email.” is not registered”;
}
}else{
return $db->error;
}
}
?>


5. Create Dashboard Using HTML and PHP

  • To create a dashboard, you have to do the following things –
  • Start session using session_start()
  • Assign session login email $_SESSION['email'] to a new variable $email_address
  • If the session login email is empty, it will redirect to the login form page. means that you can’t directly open the dashboard page without login.

File Name – dashboard.php

<?php
session_start();
$email_address= $_SESSION[’email’];
if(empty($email_address))
{
header(“location:login.php”);
}
?>
<!DOCTYPE html>
<html lang=“en”>
<head>
<title>Login Dashboard</title>
<meta charset=“utf-8”>
<meta name=“viewport” content=“width=device-width, initial-scale=1”>
<!–custom style–>
<style type=“text/css”>
*{
margin:0px;
padding:0px;
}
.header{
background: #ff8100;
}
.header h1{
text-align: center;
color: white;
margin: 0px;
padding: 25px 0px;
font-size: 40px;
}
.user-box{
text-align: center;
}
.user-detail{
width: 30%;
min-height: 100px;
display: inline-block;
background: #e8e8e8;
margin: 50px;
padding: 10px;
}
.user-detail p{
font-size:25px;
}
.user-detail h3{
font-size: 30px;
line-height: 100px;
color: #ff8100;
}
.header a{
float: right;
position: relative;
right: 60px;
top: 10px;
background: white;
text-decoration: none;
padding: 5px 20px;
font-size: 25px;
color: black;
}
</style>
</head>
<body>
<div class=“header”>
<h1>Welcome to Dashboard <a href=“logout.php”>Logout</a></h1>
</div>
<div class=“user-box”>
<div class=“user-detail”>
<p>Your Email Address</p>
<h3>
<?php
echo $email_address;
?>
</h3>
</div>
</div>
</body>
</html>


6. Create Logout Script Using PHP

You can quickly log out by writing the following few lines of PHP code.

  • First of all, start the session using session_start()
  • Destroy session using session_destroy()
  • Redirect to the login page after logout.

File Name – logout.php

<?php
session_start();
session_destroy();
header(“location:login.php”);
?>


My Suggestion

Dear Developers, I hope you have learned to create a simple login form using PHP. If you have any doubts or questions related to this tutorial, you can ask me through the below comment box. I will reply as soon as possible.

Thanks For giving time to this tutorial…

Share using
Tags:

More Similar Posts

Most Viewed Posts
Menu